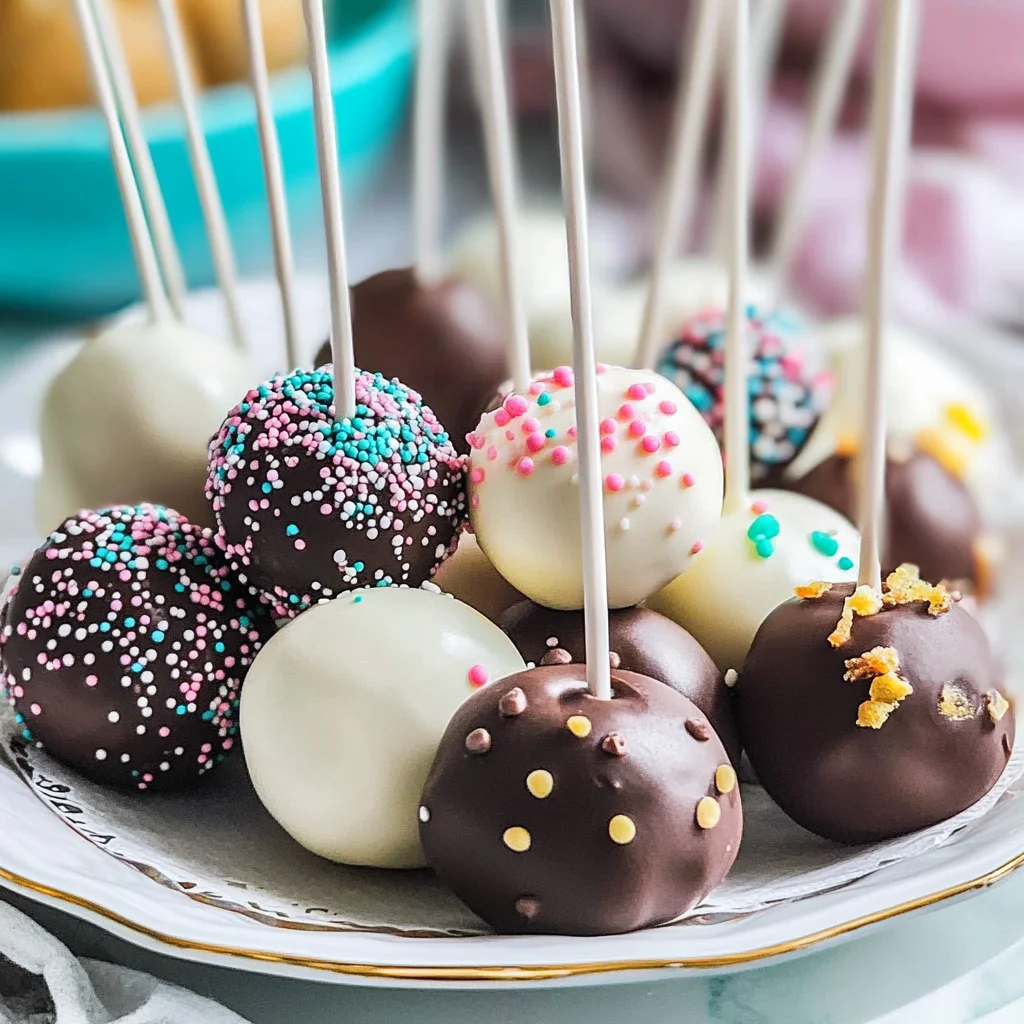
Imagine biting into a cake pop, where the sweetness of moist crumbled cake harmonizes with creamy frosting, all enveloped in a shiny chocolate coating. Each delightful morsel bursts with flavor, making it impossible to resist grabbing just one more, especially when they’re decorated like tiny works of art, ready to steal the show at any celebration.
I still remember the first time I made cake pops for my niece’s birthday party; the joy on her face was priceless as she took her first bite. Perfect for birthdays, holidays, or just a whimsical treat during the week, these little wonders promise not only to satisfy your sweet tooth but also to spark joy and laughter among family and friends. Get ready to unleash your creativity and indulge in the delightful world of cake pops!
Why Will You Keep Making Cake Pops?
Deliciously versatile, these cake pops can be made using your favorite cake mix, making them a hit for any occasion! Quick prep in just 30 minutes means you can whip them up for surprise gatherings. Endless customization with sprinkles or chocolate types allows for personal flair. Plus, they’re a fun treat that everyone loves—perfect for kids and adults alike!
Cake Pops Ingredients
- For the Cake Base
- 1 box cake mix (any flavor) – Choose your favorite flavor for a delightful base that sets the stage for your Cake Pops.
- 1 cup water – This helps hydrate the cake mix, ensuring a moist and tender crumb.
- 1/2 cup vegetable oil – Adds richness and moisture, making your cake pops incredibly delicious.
- 3 large eggs – Provides structure and stability to the cake, helping it hold together when crumbled.
- For the Frosting
- 1/2 cup buttercream frosting (store-bought or homemade) – This adds sweetness and binds the crumbled cake together for easy shaping.
- For the Coating
- 2 cups chocolate chips (milk or dark chocolate) – Use high-quality chocolate for a rich coating that complements the cake pops perfectly.
- 1 tablespoon coconut oil (for thinning chocolate) – This helps achieve a smooth, pourable consistency for easy dipping.
- For Decoration
- 1 cup sprinkles (optional) – Add fun colors and textures to your cake pops for an extra festive touch!
How to Make Cake Pops
1. Preheat the oven: Set your oven to 350°F (175°C). Prepare your chosen cake mix according to the package instructions by combining 1 cup of water, 1/2 cup of vegetable oil, and 3 large eggs. Bake in a greased pan for about 25-30 minutes until golden.
2. Crumble the cake: Once the cake has baked and cooled completely, crumble it into a large mixing bowl, breaking it into fine pieces for easy mixing with frosting.
3. Mix with frosting: Add 1/2 cup of buttercream frosting to the crumbled cake. Use your hands or a spatula to mix until well combined; this creates a moist, flavorful base for your cake pops.
4. Form balls: With your hands, roll small portions of the cake mixture into balls about 1 inch in diameter. Place them on a baking sheet lined with parchment paper for easy handling later.
5. Insert sticks: Melt a small amount of chocolate chips from your 2 cups and dip the end of each cake pop stick into the melted chocolate before inserting it into the center of each cake ball. Chill in the refrigerator for about 30 minutes to firm them up.
6. Melt chocolate: In a microwave-safe bowl, melt the remaining chocolate chips along with 1 tablespoon of coconut oil in 30-second intervals, stirring until you achieve a smooth consistency perfect for coating.
7. Coat cake pops: Dip each chilled cake pop into the melted chocolate, ensuring it’s fully coated while allowing any excess chocolate to drip off. Return them to the baking sheet once coated.
8. Decorate: While the chocolate is still wet, feel free to sprinkle with your choice of decorations from 1 cup of sprinkles if desired. Let them sit until completely set and hardened.
Optional: For an extra touch, drizzle contrasting chocolate on top after they set!
Exact quantities are listed in the recipe card below.
Tips for the Best Cake Pops
- Choose Flavor Wisely: Use your favorite cake mix flavor; chocolate and vanilla are crowd-pleasers. Just ensure it complements your frosting choice!
- Cool Completely: Allow the baked cake to cool completely before crumbling. Warm cake can lead to overly moist cake pops that are hard to shape.
- Proper Mixing: When combining the crumbled cake with frosting, aim for a dough-like consistency. Too much frosting will make the mixture soggy.
- Chill Before Dipping: Don’t skip chilling the formed balls; this helps them hold their shape better when you dip them into the melted chocolate.
- Watch the Chocolate: Melt chocolate in short intervals to prevent burning. Stir well after each interval until smooth for a perfect coating on your cake pops.
- Timing is Key: Decorate while the chocolate is still wet. If it sets too much, sprinkles won’t stick, and your decoration will be less vibrant!
How to Store and Freeze Cake Pops

- Room Temperature: Keep your cake pops in an airtight container for up to 2 days. Avoid direct sunlight to maintain freshness.
- Fridge: For longer storage, refrigerate cake pops in a sealed container for up to 1 week. This helps preserve their flavor and texture.
- Freezer: If you want to save them for later, freeze your cake pops in an airtight container for up to 3 months. Thaw in the fridge before enjoying.
- Reheating: Cake pops are best enjoyed cold or at room temperature. Avoid reheating as it can compromise their texture and coating.
Cake Pops Your Way
Feel free to get creative and personalize your cake pops with these delightful variations!
- Gluten-Free: Substitute the cake mix with a gluten-free blend for a deliciously inclusive treat. Use a gluten-free frosting to keep everything safe and scrumptious. Your loved ones will never suspect they’re enjoying a gluten-free dessert!
- Chocolate Lovers: Choose a chocolate cake mix for an extra dose of cocoa goodness. Pair this with chocolate frosting and dark chocolate coating for an indulgent experience. These rich bites are sure to satisfy any sweet tooth!
- Fruit-Filled: Opt for a strawberry or lemon cake mix to add a fruity twist. Complement with cream cheese frosting and decorate with fresh berries on top. This refreshing version is perfect for summer gatherings!
- Nutty Delight: Add 1/2 cup of finely chopped nuts, like walnuts or almonds, to the cake mix before baking. Use nut-flavored frosting, such as hazelnut, for an added layer of flavor. The crunch will elevate your cake pops’ texture beautifully!
- Dairy-Free: Swap out the buttercream frosting with coconut cream or dairy-free alternatives. Choose dairy-free chocolate chips for coating, ensuring everyone can enjoy these treats. The coconut adds a lovely tropical hint that’s hard to resist!
- Spicy Kick: Mix in a teaspoon of cinnamon or cayenne pepper into the cake batter for a surprising warmth. Pair with vanilla frosting, which balances the heat perfectly. These unique pops will surely impress adventurous eaters!
- Caramel Drizzle: After coating your pops in chocolate, drizzle them with melted caramel sauce for extra sweetness. Use sea salt to sprinkle on top for a delightful contrast. This twist makes your cake pops truly decadent!
Make Ahead Options
Preparing these delightful Cake Pops is a breeze, making them perfect for meal prep or special occasions. You can easily bake the cake base using 1 box of cake mix, 1 cup of water, 1/2 cup of vegetable oil, and 3 large eggs. Bake it at 350°F (175°C) for 25-30 minutes, then crumble it once cooled. Mix in 1/2 cup of buttercream frosting until well combined and form small balls, placing them on a baking sheet. You can even insert the sticks and chill them in the refrigerator for up to 24 hours before coating with melted chocolate—just remember to melt your chocolate chips mixed with 1 tablespoon of coconut oil when you’re ready to finish. These Cake Pops can be decorated and stored for up to 3 days, ensuring they maintain their delicious quality. When it’s time to serve, just dip them in the chocolate coating and let your creativity shine with sprinkles!
Cake Pops Recipe FAQs
What kind of cake mix can I use for cake pops?
You can use any flavor of cake mix that your heart desires! Chocolate, vanilla, red velvet, or lemon all work wonderfully. The great thing about cake pops is their versatility, so feel free to experiment with seasonal flavors or your family’s favorites.
How should I store leftover cake pops?
If you have any leftover cake pops (though they likely won’t last long!), you can store them in an airtight container in the refrigerator for up to a week. Just make sure they’re completely set before sealing to prevent any sticking!
Can I freeze cake pops for later?
Absolutely! Once your cake pops are fully coated and set, you can freeze them. Place the pops on a baking sheet and freeze until solid, then transfer them to a freezer-safe bag or container. They’ll keep well for up to 3 months—just thaw them in the fridge before serving!
What do I do if my chocolate coating is too thick?
If your chocolate seems too thick for dipping, don’t worry! Simply add an extra teaspoon of coconut oil and reheat gently in the microwave at 30-second intervals, stirring until you achieve a smooth consistency. This will make dipping much easier and give your cake pops a lovely finish.
How many servings does this recipe yield?
This delightful recipe yields about 4 servings, with each pop containing approximately 150 calories. Feel free to double or triple the ingredients if you’re planning for a party or gathering—they’re always a hit!
Can I use homemade frosting instead of store-bought?
Definitely! Using homemade buttercream frosting not only adds to the richness but also allows you to customize flavors. Just make sure it’s thick enough to hold the cake mixture together; about 1/2 cup should do nicely!